A great voiceover doesn't just add sound, it adds emotions, delivers information, and creates a stronger connection with your audiences. However, adding voiceover to video is troublesome. You will need expensive recording equipment, a quite room, a voice actor, plus a professional editing software.
AI-powered tools like FlexClip change that. You can generate AI voiceover and add it to video without hassle. Check the following parts, achieve studio-quality results with us.


Can't Miss: How to Record Screen & Audio Online >
Part 1. Add AI Voiceover to Video
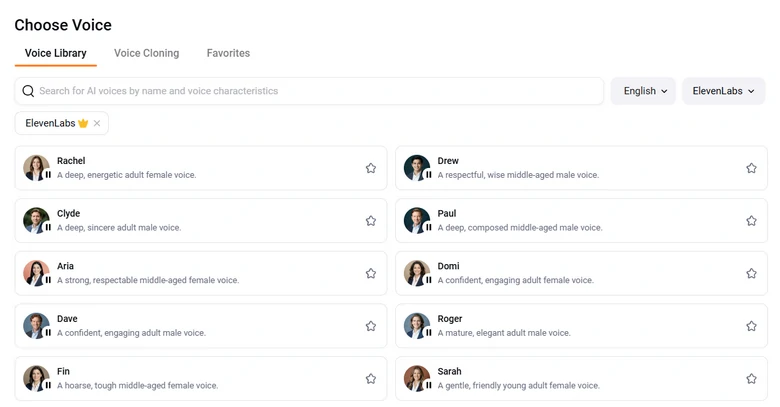
AI voice generation tools are not hard to comeby, but FlexClip is one of a kind. Backed up by the most advanced models from Google, Microsoft, Minimax, ElevenLabs, Fast Fish, you can render among over 3000 voices, multiple language options, and customizable tones.
What makes FlexClip truly special is its all-in-one workflow. After the AI voice is generated, you are able to sync it with your video, add subtitles, background music, change speed, etc. No switching between multiple tools.
Click the Generate AI Voice button, follow us to create and add AI voiceover to video.

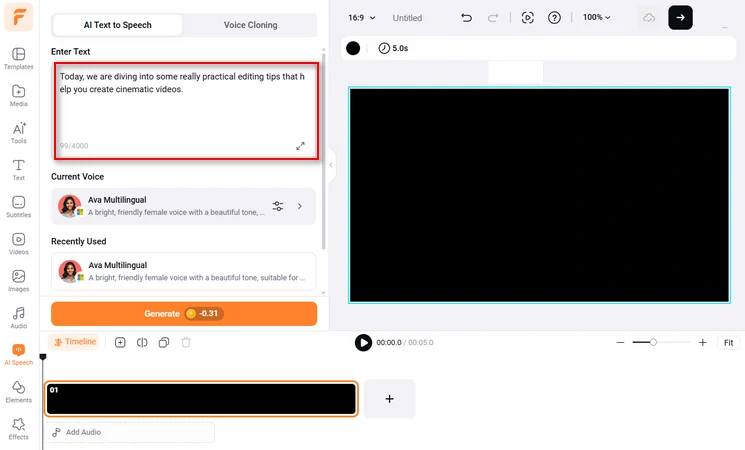
Enter Voiceover Script
Generate AI Voice
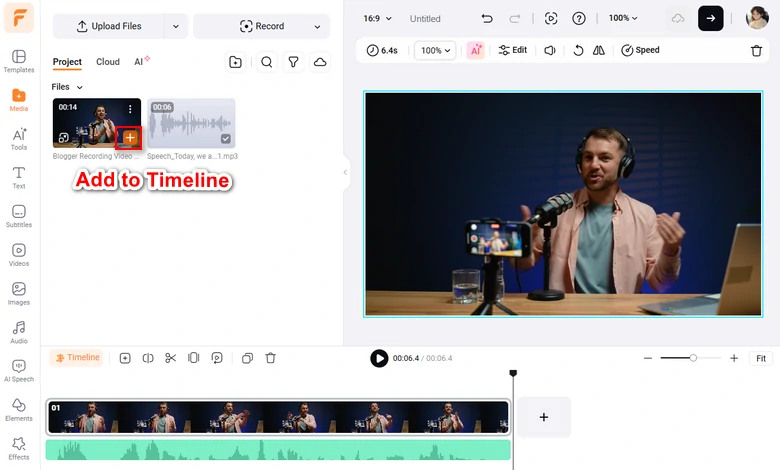
Add Voice/Video to the Timeline
Part 2. Manually Add Narration to Video
Prefer your own voice in video instead of AI ones? FlexClip backs you up. You can seamlessly merge audio files with a video and make easy adjustments.
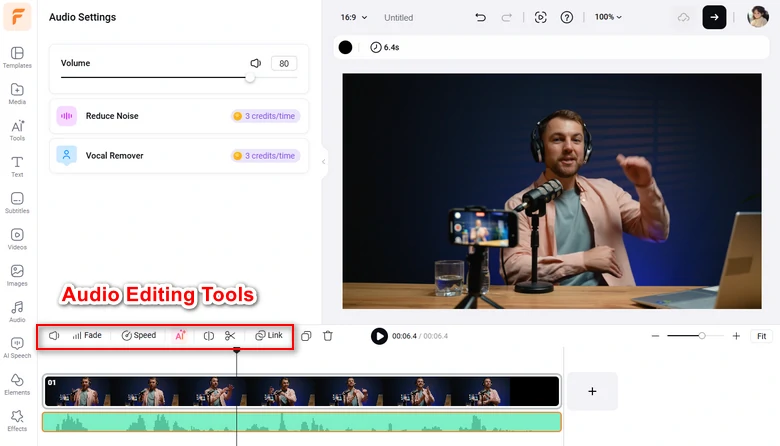
Edit Audio in Timeline
Part 3. Add Voiceover to Video on Your Phone
Adding voiceover to video on desktop guarantees you a more precise output. However, if you need to balance high-quality output and fast editing, the best option is CapCut.
Most mobile video editors contain less tools than that of computer ones. CapCut is different. It offers useful features like merging, background music, noise reduction, and AI-powered tools to help improve the overall video quality. Besides, you can easily access TikTok-popular resources from CapCut. Follow us to add voice over to video with CapCut right now.
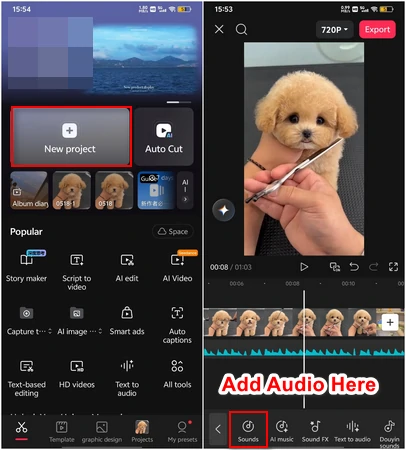
Add Voiceover to Video on Mobile
Tips for High-Quality Voiceovers
To get a seamless, professional-level mix where voices sounds professional and perfectly timed with the visuals. Here are some essential technical tips.
If you have to sync manually, zoom all the way into your timeline until you see individual frames. Look for the starting point of the voiceover and line it up with the visuals perfectly. Being even two frames out of sync will look like an old dubbed movie.
To make sure your voiceover is crisp and audible on video, you must mix to standard decibel targets. 6dB to 12dBis the sweet spot for human speech. As for background, 18dB to 24dB is perfect. However, it should sits well below the voice. When someone is talking, it should get down to around 15dB.
Nobody likes abrupt voiceover start and finish. Ensure the fade down and fade up times of music are smooth. If possible, use keyframe to automatically lower or boost the music by a set amount.
Frequently Asked Questions
1. Should I edit my video first or record the voiceover first?
It very depends on the video. For script-driven videos like documentaries, it is best to record the voiceover first. You can edit the video pacing and visual cuts to match the rhythm of the speech. For visual-driven videos like vlog, it is better to edit the video first, then record the voiceover while watching the playback.
2. What's the best audio file format to use for a voiceover track?
While importing audio to video editor like FlexClip, it is better to use uncompresssed formats like WAV or AIFF. Avoid using compressed formats like MP3 that may cause a noticeable drop in audio clarity.
3. How do I fix the weird, unnatural pauses that AI voiceovers sometimes have?
Don't just drop the entire AI audio file onto your timeline. Cut the audio track into individual sentences or phrases. This allows you to manually slide the clips together or further apart to match the visual perfectly.


FlexClip AI Video Maker
Reach professional-quality videos faster with easy editing tools, templates, and smart AI.
Start Now for Free
Hot & Trending
-

7 Best Ways to Find Music in YouTube Videos
-

Instagram Story Video Quality Bad After Upload? Fix It!
-

How to Repost Video on TikTok & How to Remove TikTok Repost
-

Improve Video Quality Online: 3 AI Video Quality Enhancers You Can't Miss
-

4K Convert to HD 1080p without Watermark: Best 4k Video Converters
-

Top 13 Birthday Video Makers with Music and Effects Free
-

How to Search Filters on TikTok & Use a Filter You See - TikTok Filter Guide
-

Large Collection of Creative and Funny Birthday Video Ideas for Ones You Care